

Quick Answer
A client onboarding checklist is one A4 form you complete with every new customer before you raise a quote or book a date. Done well, it captures contact details, site access, scope, decision maker, payment terms, GDPR consent, and access constraints, then sits with the job from first call to final invoice. Below is a free 2026 template in Word, PDF, and printable A4, plus the way I set it up inside ServiceM8 so the office never has to chase a postcode again.
Table of Contents
- Why this one form pays for itself in a week
- What's inside the checklist
- Download the free template (Word, PDF, A4)
- How to use it in the field
- Setting it up in ServiceM8, Jobber, or Tradify
- Auto-populating fields with AI
- GDPR, consent, and what to keep
- What tradespeople are saying
- Recommended videos
- Frequently asked questions
Why this one form pays for itself in a week

Most trades businesses lose money in the same five places. Wrong postcode. No parking note. Joint owner not on the quote. Boiler model not recorded. No GDPR tick. Each one looks small. Add them up across a month and you have a day of wasted office time and a few jobs that quietly stall.
A client onboarding checklist fixes that in one sweep. You agree what you need to know before pricing, write it down once, and use the same form for every new enquiry. The first time you save a Saturday because the office already has the parking instructions, the form has paid for itself.
This is not a sales pitch document. It is an internal capture form. It belongs with you on the first site visit, or attached to the first quote email if the job is being priced from photos. For trades that send compliance paperwork at the same time, pair it with the free ServiceM8 invoice template so quote, scope, and payment terms are captured in one consistent place.
What's inside the checklist
The free template has twelve sections. Each one is on the form because skipping it has cost someone, somewhere, a day or a few hundred pounds.
| Section | What you capture | Why it matters |
|---|---|---|
| 1. Lead source | How the customer found you (Google, referral, GBP, repeat) | Tells you where to spend your marketing budget |
| 2. Decision maker | Full name, role, and whether anyone else has to sign off | Stops you quoting and then being told "I need to ask my husband" |
| 3. Contact preferences | Best number, best time, WhatsApp vs phone vs email | Cuts the number of voicemails left and ignored |
| 4. Site address and access | Full postcode, parking, gate codes, dog warning, key collection | The single biggest source of wasted van miles |
| 5. Property type and age | Detached, terraced, flat, listed, year built where known | Drives material choice and warns of asbestos era |
| 6. Scope and brief | What the customer is actually asking for, in their words | Reduces "but you said" disputes later |
| 7. Existing systems | Boiler make and model, fuse board type, water mains stop tap | Saves a discovery visit before the quote |
| 8. Timeline and constraints | Desired start, hard deadlines (sale, birth, holiday) | Lets you schedule honestly, not aspirationally |
| 9. Budget signal | Open question, no demand for a figure | Stops you wasting a day quoting a job they cannot afford |
| 10. Payment terms agreed | Deposit, stage payments, final invoice trigger | Aligns expectations before work starts |
| 11. Risk and safety notes | Vulnerable adult, asbestos suspicion, height work, gas isolation | Required for your method statement and RAMS |
| 12. GDPR consent | Marketing opt-in, before/after photo permission, review consent | Legal cover for everything you do after the job ends |
Twelve fields, one page. If you find yourself adding more, you are building a project plan, not an onboarding form. Keep it short or no one will fill it in.
Download the free template (Word, PDF, A4)

The template ships in three formats. Pick whichever fits how your team works.
PDF (fillable) · type directly into the form on a phone or tablet, save back into your job folder. No printer needed.
Printable A4 · black and white, ink-light, designed for clipboards. Good for engineers who still prefer pen.
All three files contain the same twelve sections. The PDF is the version most TrainAR Academy readers use because it works with ServiceM8 and Jobber's mobile apps without any extra software.
All three files contain the same structure. The PDF works on a tablet, the Word file is for branding it up with your logo, and the printable A4 is the version most engineers actually use in the field. If you would rather build your own from scratch, the twelve-section structure above is yours to copy and adapt.
How to use it in the field
The form is only useful if it gets filled in. That sounds obvious. In practice, half the trades businesses I work with print the form, put it in the van, and then keep doing things the old way. Build it into the workflow or it sits in a folder.
There are three moments where the form earns its keep. First call. First site visit. First job in the diary. If you use it at all three, you will never again find out the parking is a nightmare on the morning of the install.
If you price from photos rather than visiting, send the customer a short version of the form via email or WhatsApp before you reply with a price. Three lines: full postcode and parking notes, decision maker name, and any access constraints. Those three answers stop most of the issues that show up on day one.
Setting it up in ServiceM8, Jobber, or Tradify

The paper form is the starting point. The real win comes when the same twelve fields live inside your job management software and travel with the job from quote to invoice.
Each platform handles this slightly differently:
- ServiceM8 · create a custom form (Settings → Forms) and attach it as a required step on the "New enquiry" job stage. Field types include text, dropdown, signature, and photo. The form syncs to the mobile app automatically.
- Jobber · use custom fields at the client level for the contact and access details, and custom fields at the job level for the scope, timeline, and existing systems sections. Tag clients who have opted in for marketing.
- Tradify · create a custom job checklist with the twelve sections as required checks. The mobile app prompts engineers to tick each one before they can mark the job complete.
If you already use one of these systems, build the form once and you never have to think about it again. New job, new checklist, every time, automatically.
If you have not yet picked an FSM tool, the ServiceM8 job report template walks through the form-building process step by step. The same pattern works in Jobber and Tradify.
Auto-populating fields with AI
This is the part most trades businesses are not yet doing. The customer's first contact, whether it lands by phone, email, WhatsApp, or web form, almost always contains five or six of the twelve fields already. The customer wrote them. Why are you typing them again?
A short AI workflow can pull those fields out and pre-fill the form. The setup looks like this:
- Customer fills in your website enquiry form, or sends a WhatsApp message, or leaves a voicemail.
- The message lands in a single inbox (Gmail, a shared address, or a WhatsApp Business inbox).
- An n8n or Make.com workflow reads the message and extracts: name, address (if given), what they want done, urgency words, and any access notes.
- The workflow creates the new job in ServiceM8 or Jobber with those fields already populated.
- You arrive at the site visit with seven fields already done and four to confirm.
If you want to see the workflow built end to end, the n8n vs Make.com vs Zapier comparison covers which platform suits which size of business, and how the pricing works out.
GDPR, consent, and what to keep

Under UK GDPR, you can hold customer information that you need to deliver the service. Name, address, phone, scope, payment details. That is what is called legitimate interest. You do not need explicit consent for any of that.
What you do need consent for is anything beyond delivering this specific job. Marketing emails. Before and after photos used on your website or Instagram. Using their name in a case study. Sharing their details with a referral partner. Reviews requests that name them.
The template includes a consent block at the bottom with three tick boxes:
- I am happy to receive occasional updates and offers from [your business name]
- I give permission for before and after photos of my property to be used on social media and the company website (no identifying details visible)
- I am happy to be contacted for a review of the work after completion
Each one is opt-in, not opt-out. That is the GDPR rule that catches most trades businesses out. A pre-ticked box is not consent.
What tradespeople are saying
Recommended videos

New Client Onboarding Checklist Template That Cut Our Churn by 40%
Service business operations

How To Setup A Full Client Onboarding Process (Template)
Step-by-step process build

My Client Onboarding Process (Walkthrough + Templates)
20-minute onboarding workflow

Easiest Client Onboarding Process in 2026 (Copy This!)
Current best practice walkthrough

Automate Customer Onboarding with Microsoft Forms and Power Automate
Form-to-system automation
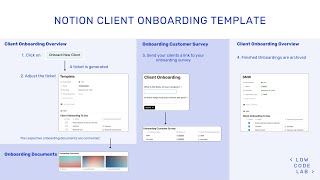
Notion Client Onboarding Template
Digital onboarding setup
Frequently asked questions
Yes. Even for the small jobs. The cost of skipping it is one missed parking instruction, one wrong boiler model, one quote sent to the partner who is not the bill payer. The form takes seven minutes. Sorting out the mistakes costs an afternoon.
Not the whole thing. Customers will fill in name, address, and what they want done. They will skip the rest. Send a short three-field version for remote pricing, and complete the full form yourself during the site visit while you ask the questions naturally.
The onboarding form captures information. The quote uses that information to produce a price. You always do onboarding first, quote second. Trying to quote before you have done the onboarding is how trades businesses end up with disputes on day one.
Inside the job record in your FSM tool, ideally. If you are not using one yet, a customer folder in Google Drive or OneDrive named with the customer surname and house number works fine. Keep them for six years to satisfy HMRC.
The form is GDPR-friendly. Your overall compliance depends on having a written privacy notice on your website, telling customers how long you keep their data, and only using their information for what they have agreed to. The form's consent block covers the marketing and photo use bit. The rest of your compliance is a separate, one-off setup.
That is the point. The Word file is fully editable. Gas engineers add boiler make, model, and flue type. Electricians add CU make and RCD type. Roofers add height access notes. Keep the twelve sections, swap the specific questions for your trade.
No. Onboarding is for new customers. For repeat work, you review the existing form, update anything that has changed (new boiler, new fuse board, change of decision maker), and crack on. That is one of the biggest wins of having it on file in the first place.
My verdict
This is the cheapest, most useful template I recommend to any trades business that wants its office to stop chasing customers for basic information. Build it once, attach it to your FSM tool, and the rest takes care of itself. The businesses that do this consistently are the ones that grow without the founder having to be on every job. Worth seven minutes per customer.