

Quick answer
Payaca is the only field service platform built specifically for UK renewables installers, with MCS document templates, BUS grant tracking, DNO submission through ENA Connect, and Heatpunk heat loss integration baked in. The Accelerator plan starts at £299 a month for newly incorporated MCS-registered businesses. A solo installer can configure the whole system in roughly four hours: pick your plan, build your MCS document pack, set up your solar and heat pump product catalogue, connect your design tools, wire up the BUS workflow, configure DNO submission, build your proposal templates, and turn on Agent Dave for the AI assist. Most installers are fully live within two to four weeks.
Table of contents
- Why renewables installers need purpose-built software
- What you'll need before you start
- Step 1: Pick the right plan
- Step 2: Build your MCS document pack
- Step 3: Load your solar and heat pump product catalogue
- Step 4: Connect Heatpunk, EasyPV and OpenSolar
- Step 5: Set up BUS grant tracking
- Step 6: Configure DNO submission via ENA Connect
- Step 7: Build multi-option proposal templates
- Step 8: Turn on Agent Dave and automations
- Common mistakes to avoid
- What installers are saying
- Recommended videos
- Frequently asked questions
- My verdict
Why renewables installers need purpose-built software

If you install solar, heat pumps, batteries or EV chargers, generic field service software will let you down. I have watched installers try to bend Jobber, ServiceM8 and even Tradify around MCS-compliant workflows, and it almost always ends the same way: spreadsheets bolted to the side, WhatsApp threads holding the project together, and a panic the night before an MCS audit.
The admin load is brutal. Heat loss calculations, compliant designs, MCS forms, BUS voucher evidence, DNO applications, commissioning certificates, handover packs, manufacturer warranties, RECC documentation, F-Gas logs. According to industry body data, the typical heat pump install carries one to two days of office work on top of the physical job. Baxi launched a whole umbrella service in 2025 just to take some of that load off installers.
Payaca was built from day one for this market. It is the only UK field service platform with MCS document templates, BUS grant tracking, ENA Connect for DNO applications, and Heatpunk integration baked in as standard. That matters because every hour you spend wrestling generic software is an hour you are not on a roof or in a plant room. With a 600,000-heat-pump-per-year target by 2028 and rooftop solar at record levels, the businesses that win the next decade will be the ones with admin systems that scale.
If you are still convinced you can get away with a quoting tool plus a folder of Word templates, ask any auditor what they think. You can read more on the broader landscape in our guide to AI tools for tradespeople in 2026.
What you'll need before you start
- An MCS-registered business (or active application in progress)
- Your MCS document templates: design certificate, commissioning certificate, customer handover pack
- Your supplier price lists for solar panels, inverters, batteries, heat pumps and ancillaries
- A Stripe account for taking deposits (free to create)
- An ENA Connect account for DNO submissions (free, register at energynetworks.org)
- Your Ofgem BUS installer account if claiming grants (free to set up once MCS-registered)
- Your Heatpunk or EasyPV credentials if you use them for design
- Roughly four hours of uninterrupted desk time
Time investment: four hours for a solo installer doing the full configuration. Two to four weeks for a team of five or more, because data migration from old systems takes longer than the setup itself. Skill level: intermediate. You need to be comfortable uploading PDFs, mapping fields and writing short HTML snippets for document templates. Cost: free trial available, then £299 a month minimum on the Accelerator plan, plus a one-off £1,500 onboarding fee on the Growth plan upwards. Prices exclude VAT.
Step 1: Pick the right plan

Payaca has three tiers. Pick the smallest one that fits your current team, not the biggest one you might grow into.
Accelerator (£299/month, up to 25 users, 12 months only). This is the standout option for new MCS-registered businesses. To qualify you need to be incorporated within the last 24 months, employ eight people or fewer, and hold an active MCS registration. You get everything in the Growth plan plus two funded onboarding sessions and the best-in-class install workflow template. After 12 months you roll onto Growth pricing.
Growth (£999/month billed annually or £1,199 monthly, 25 users included). The standard plan for established installers. You get Agent Dave (the AI assistant), custom automations, customer portal, integrations and priority support. Additional seats are £30 each up to 50 users. The one-off onboarding fee of £1,500 buys you guided setup, which is worth it if you are migrating from another system.
Scale (custom pricing, 50+ users). Custom integrations, support SLAs, onsite consulting, data warehouse sync, franchisee management. Only worth a conversation if you are running multiple branches or franchising the business.
SMS messages cost 4p each on top of any plan, so factor that in if your automations send a lot of customer texts. All prices exclude VAT.
Step 2: Build your MCS document pack
This is the step that separates a tidy MCS audit from a stressful one. Payaca uses custom fields and HTML document templates to generate MCS-compliant paperwork automatically from your project data. Once you set it up properly, you never type the same customer address into three different forms again.
Start in Settings, Document templates. Payaca ships with a baseline template pack for MCS Heat Pump and MCS Solar PV. Open each template and walk through every field. Map every variable to a Payaca custom field on the project. You want fields for: customer details, install address, MPAN or MPRN, system specification, heat loss figure, SCOP, DNO reference, BUS voucher number, manufacturer warranty references, commissioning checklist items, and customer signature blocks.
Build three core documents first:
- Design certificate. Auto-populated with heat loss inputs from Heatpunk or system size from your solar design tool. Includes manufacturer model numbers pulled from your product catalogue.
- Commissioning certificate. Tied to the mobile commissioning checklist your engineer fills in on site. Photo evidence stored against the project record.
- Customer handover pack. Combined PDF containing operating instructions, warranty cards, MCS certificate copy and contact details for service calls.
Test each template with a fake project before going live. Generate the document, open it as a customer would see it, and check every field has populated correctly. Empty placeholders in a real MCS audit will lose you points fast.
Step 3: Load your solar and heat pump product catalogue
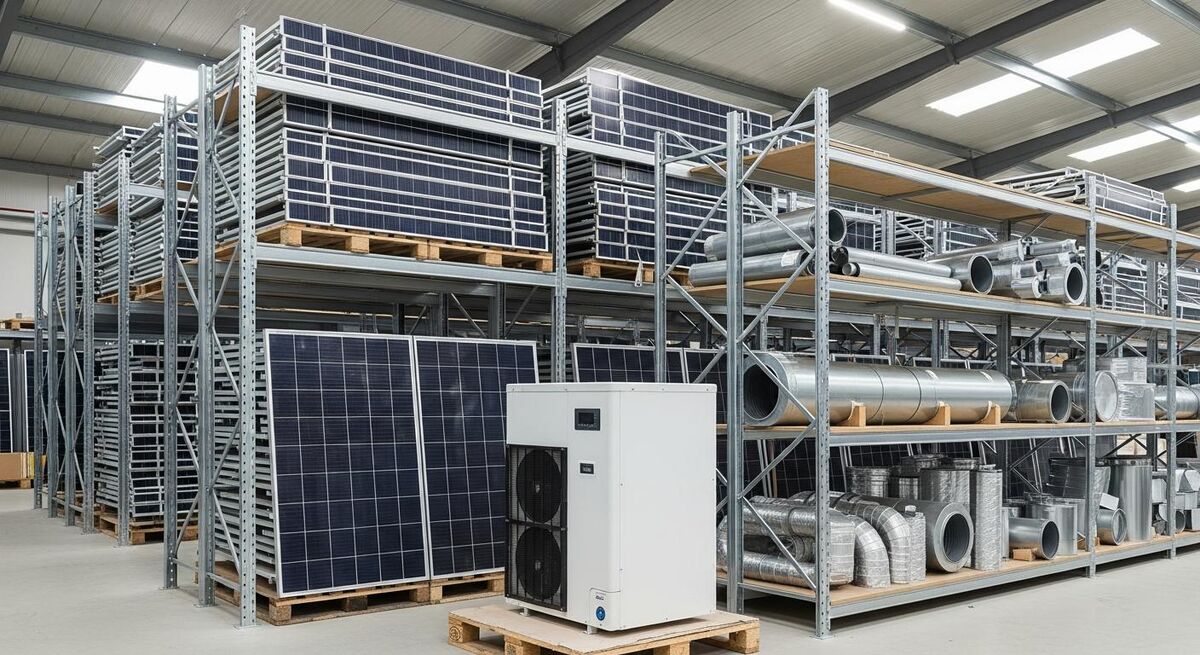
The product catalogue is where most installers cut corners and pay for it later. Spend an afternoon getting it right and your quoting time drops from hours to minutes.
Go to Settings, Items. Build out three top-level categories: Solar PV, Heat Pumps, and Bundles. Under Solar PV, add subcategories for panels (split by manufacturer and wattage), inverters (string and hybrid), batteries, mounting kits, DC isolators, AC isolators, cables, and labour. Under Heat Pumps, add air source and ground source units (split by manufacturer and kW), cylinders, buffer tanks, controls, pipe and fittings, immersion heaters, and the various install labour rates.
For every item, set: cost price, sale price, supplier reference, manufacturer warranty term, MCS-eligible flag (boolean), and an internal install time estimate. The install time matters because Payaca uses it to forecast job duration on the schedule, which feeds directly into route planning later.
Build at least three Bundles to start: a 4kW solar PV install, a 6kW solar PV install with battery, and a standard 8kW air source heat pump install with a 250-litre cylinder. These become the foundation of your multi-option proposals in step seven. Bundles save you from rebuilding the same quote thirty times a month.
Step 4: Connect Heatpunk, EasyPV and OpenSolar
Payaca integrates directly with the three design tools UK renewables installers actually use. The integrations are free and live inside Settings, Integrations. You authenticate once and the design data flows into Payaca projects from then on.
Heatpunk for heat pumps. Run your heat loss calculation in Heatpunk as normal. When the design is finished, the system sizing, equipment specification and heat loss figures import straight into the Payaca project. The customer's address, room data and emitter sizing all land in the right custom fields. From there your design certificate generates itself.
EasyPV and OpenSolar for solar. Same pattern. Design your array in either tool, then pull the system specification into Payaca. Panel count, inverter selection, predicted annual generation and shading data all map across. Payaca treats the design tool as the source of truth for the technical spec and uses it to populate proposals and certificates.
The benefit is not just time saved. It is that you have one project record with one address, one customer name and one system spec across every document. No more typos between the design tool, the quote, the DNO application and the MCS certificate.
Step 5: Set up BUS grant tracking
The Boiler Upgrade Scheme is an installer-led grant. You apply on behalf of the customer, redeem the voucher once installation is complete, and pass the £7,500 to the customer as a discount from their invoice. That sounds simple. The reality is a chain of evidence the size of a small filing cabinet.
Payaca handles this through a dedicated BUS workflow stage on the project pipeline. In Settings, Pipelines, add a stage called "BUS voucher" between "Survey accepted" and "Install scheduled". Configure it to require these fields before the project can advance:
- EPC certificate uploaded (PDF)
- BUS application reference
- BUS voucher issue date
- BUS voucher expiry date (three months from issue typically)
- Customer property type (owner-occupied, private rental, etc.)
- Heating system being replaced (gas, oil, LPG, electric, biomass)
The grant value is £7,500 for an air source heat pump, £7,500 for a ground source heat pump, and £5,000 for a biomass boiler. From summer 2026 the ASHP grant rises temporarily to £9,000 for households on oil or LPG. Build separate proposal templates for each scenario so the grant deduction line shows automatically on the customer's quote.
Set up an automation: when a project moves into the BUS voucher stage, send the customer an automated email with their voucher reference, the expiry date, and a clear note that the install must complete before that expiry. This single automation will save you uncomfortable conversations about expired vouchers.
Step 6: Configure DNO submission via ENA Connect
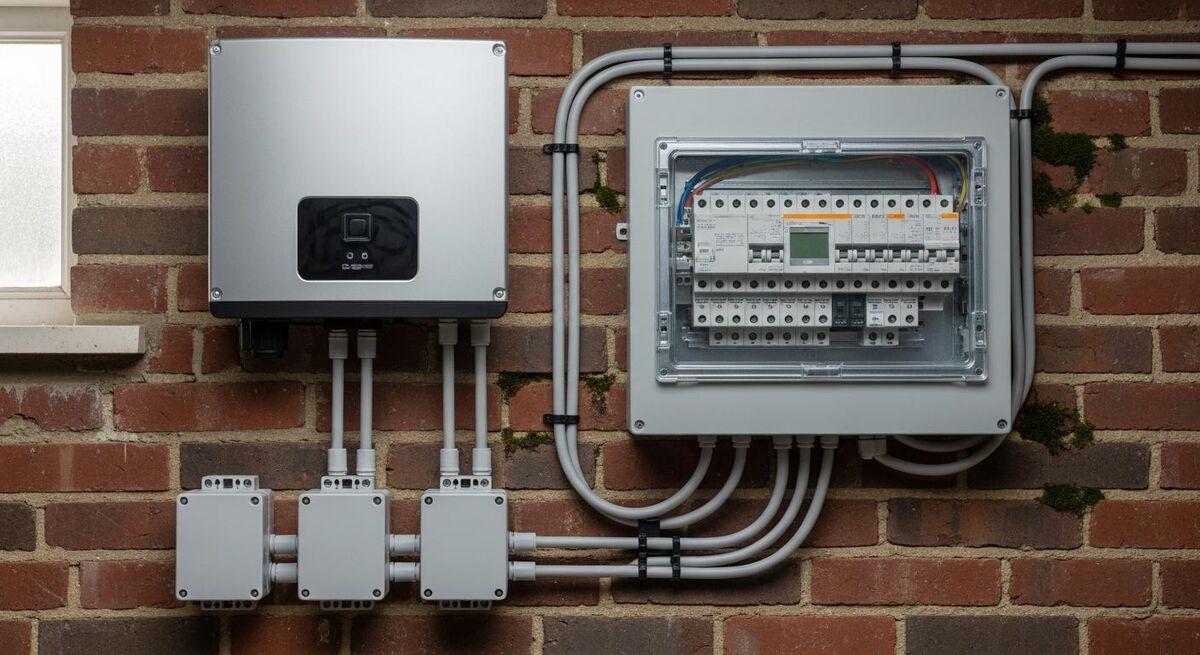
Every solar PV install needs a DNO notification or application. Payaca submits directly to the Distribution Network Operator through the Energy Networks Association's ENA Connect portal. You configure it once and submit from inside the project.
The rules: if your inverter is under 3.68kW per phase, you file a G98 application. This is the "connect and notify" route. Install first, then notify the DNO within 28 days of commissioning. If your inverter is over 3.68kW per phase, you file a G99 application. This needs pre-installation approval and typically takes 10 to 45 working days, though complex sites can run longer.
In Payaca, set up two custom fields on every solar project: "Inverter capacity per phase (kW)" and "DNO application type (G98 / G99)". Build an automation that flags every G99 project the moment it enters quoting, with a reminder to submit the application as soon as the customer signs. That four-week DNO lead time is the silent killer on solar install schedules.
For battery storage on top of solar, you nearly always need G99 regardless of inverter size because the combined export capacity tips you over the threshold. Default to G99 if a battery is in the bundle.
Step 7: Build multi-option proposal templates
This is where Payaca starts paying for itself. Multi-option proposals (good, better, best) increase your conversion rate and your average order value at the same time. Customers love feeling in control. You love that they almost always choose the middle option.
Go to Settings, Proposal templates and build three core templates:
- Solar only. Good = 4kW system with string inverter. Better = 4kW system with hybrid inverter (battery-ready). Best = 6kW system with hybrid inverter and 5kWh battery.
- Heat pump only. Good = base ASHP install with existing radiators. Better = ASHP plus weather compensation controls. Best = ASHP with new low-temperature emitters and zone controls.
- Combined renewables. Good = solar PV plus EV charger. Better = solar PV plus battery plus EV charger. Best = solar plus battery plus heat pump plus EV charger.
Each template should include: hero image of the kit, system specification summary, predicted annual generation or heat output, ROI calculation, BUS grant deduction line (if applicable), payment schedule with deposit through Stripe, e-signature block, and a clear next-steps section. Our guide on AI-assisted quoting covers how to speed this up further if you want to push proposal creation under five minutes.
Enable Stripe inside Settings, Payments. Configure deposits at 10% on solar installs, 15% on heat pumps, and 20% on combined bundles. The customer signs and pays in one click. Payaca creates the project, moves it to the install pipeline, and notifies your scheduling team automatically.
Step 8: Turn on Agent Dave and automations
Agent Dave is Payaca's AI assistant, included on the Growth plan upwards. Unlike most AI features that are bolted on for marketing, Agent Dave actually takes real actions inside the platform. Ask it to "find all projects with expired BUS vouchers in the last 30 days" and it returns the list. Ask it to "schedule a service visit for every customer who bought a heat pump in 2023" and it builds the schedule. Ask it to draft a follow-up email for every quote unresolved after two weeks, and it drafts them.
Turn it on in Settings, AI. Walk through the three default workflows it offers: proposal follow-up, no-response chasing, and post-install review request. Configure the tone of voice to match your brand. Set rules for which actions need your approval before sending and which can run automatically.
Then build your automation library. Payaca ships with 70+ workflow triggers. Start with these eight:
- New enquiry received, send acknowledgement within 5 minutes and create a survey appointment task
- Proposal sent, follow-up email at 3 days, 7 days, 14 days if not signed
- Deposit paid, send welcome email with project portal login and expected timeline
- Install scheduled, send confirmation 7 days before, 1 day before, and morning-of arrival text
- Install complete, send handover pack within 24 hours
- Commissioning certificate uploaded, trigger MCS certificate generation and customer notification
- 30 days post-install, send satisfaction survey and Google review request
- 11 months post-install, send annual service reminder and renewal proposal
You can build all eight in roughly an hour. Once they run, you stop dropping balls. The last point matters most. Annual service contracts on every install you do create predictable recurring revenue, and Payaca's service plans feature handles the billing automatically. If you want to take the customer service automation further, an AI chatbot on your website can handle the first round of qualification before the lead even hits Payaca.
Common mistakes to avoid
I have seen the same handful of mistakes destroy Payaca rollouts. Here are the four to dodge.
What installers are saying
Recommended videos

Payaca workflow demo: a core process for renewable installers
Payaca

How to use the Payaca field service app: full tutorial & demo
Payaca

From site survey to client handover: Payaca workflow demo
Payaca

Create recurring revenue with Payaca's service plans
Payaca
Payaca integration with Spruce: streamline your heat pump service
Payaca

10 things to know before getting solar panels installed in 2026
The Eco Experts
Frequently asked questions
If you are MCS-registered and doing more than two installs a month, yes. The Accelerator plan at £299 saves you roughly two days of admin per install once it is set up. That is the cost of one heat pump install paid back in a single month. Below two installs a month, you can probably get by with manual templates and a spreadsheet, but you are limiting your growth ceiling.
It depends on your in-house competence. Payaca handles the document generation, evidence tracking and audit trail brilliantly. What it does not do is design your system for you or sign off the technical work. If you have a Technical Supervisor on the team, Payaca plus a design tool covers you. If you are leaning on an umbrella service for the design and supervision side, you keep both.
A solo installer following this guide will be live in roughly four hours of focused work. A team of five to ten needs two to four weeks because of data migration and team training. Payaca's onboarding team handles the migration on Growth and Scale plans, which is mostly what you are paying the £1,500 onboarding fee for. Worth the spend if you have meaningful data to bring across.
Direct submission through ENA Connect. You configure the integration once with your installer credentials and submit G98 and G99 applications without leaving Payaca. The submission tracking lives on the project record so you can see exactly where every application stands without logging into a separate portal.
You can export all your project, customer and document data via the data export tool in Settings. Documents export as PDFs, project data as CSV. Do this once a quarter as a backup habit regardless of whether you are cancelling. Cloud platforms have outages and you want your MCS evidence in your own hands.
Yes. The mobile app works offline on both platforms, which matters when you are commissioning a heat pump in a rural property with no signal. The commissioning checklist, photo uploads and customer signature capture all work offline and sync the moment you regain connection.
Agent Dave sits inside your data, so it can take actions on real projects without you copying and pasting context. Ask it to find all customers who bought a battery before 2024 and it actually runs the query. ChatGPT will help you draft an email but it cannot read your project pipeline. Different tools for different jobs. I use both.
My verdict
I have watched a lot of installers waste money trying to bend generic field service software around an MCS workflow. Payaca is the only platform on the UK market that was designed for this from day one, and the difference is obvious within a week of using it. The Accelerator plan at £299 is the right starting point for any newly incorporated MCS-registered business and saves you roughly £8,400 in your first year compared to Growth. Spend an afternoon on the configuration in this guide and you will get that time back inside a month. With 600,000 heat pump installs a year by 2028 and solar at record levels, the businesses that scale the right way will be the ones with admin systems that scale with them. Payaca is one of the few that does. Mate, just don't skip the MCS template setup. That is the difference between a tidy audit and a stressful one.