QR equipment inspection checklist for construction: setup with AI photo checks and auto work orders
Jump To...

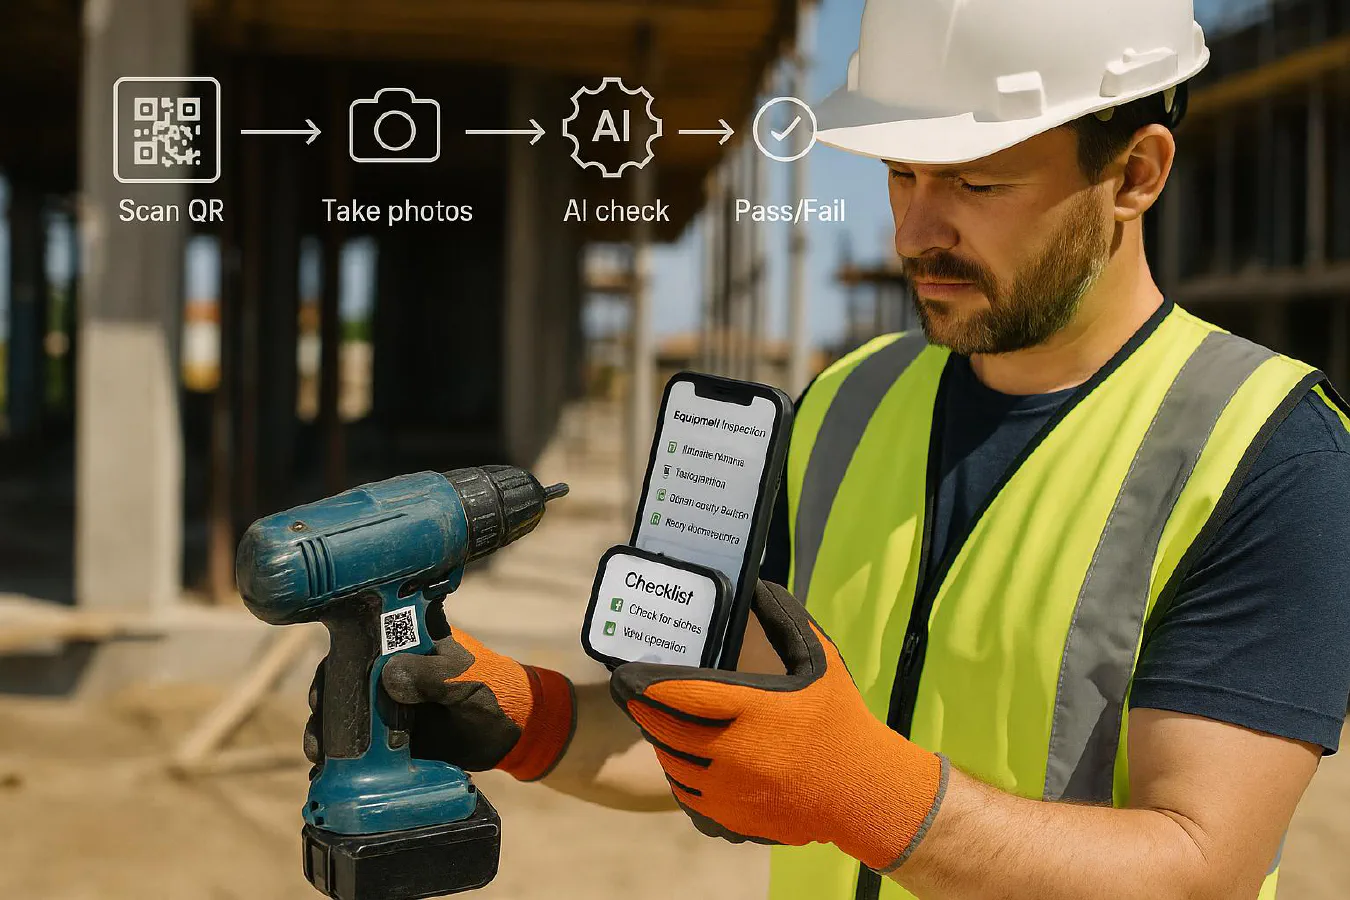
Engineer scanning a QR code tag on a tool to start an inspection on site
Quick answer
- Put a unique QR tag on every bit of kit you want checked (plant, power tools, leads, MEWPs, small lifting gear).
- Scanning the QR opens the correct checklist on a phone. It logs who, where and when automatically.
- Workers must add mandatory photos (guards, cables, serial plate). An AI photo check flags common defects and blocks a pass if something looks wrong.
- Pass = time‑stamped record saved. Fail = the system raises a work order, tags the item out of use and pings the right person on WhatsApp/Teams.
- It satisfies day‑to‑day PUWER inspections and builds an audit trail, but you still need formal LOLER thorough examinations where required.
Who this is for
- Owners and site managers who want clean, consistent pre‑use checks with photos as proof.
- Subcontractors who need simple evidence of inspections for principal contractor audits.
- SMEs who don’t want full-blown CMMS software but need better control than paper.
What UK rules say in plain English
- PUWER: Work equipment must be suitable, maintained and inspected at suitable intervals by a competent person. See HSE: inspection of work equipment.
- LOLER: Lifting equipment has extra duties for thorough examination and reporting. See HSE: thorough examinations and inspections of lifting equipment.
- Your QR workflow helps with routine inspections and record keeping. It doesn’t replace mandatory thorough examinations under LOLER.
How the QR + AI inspection flow works
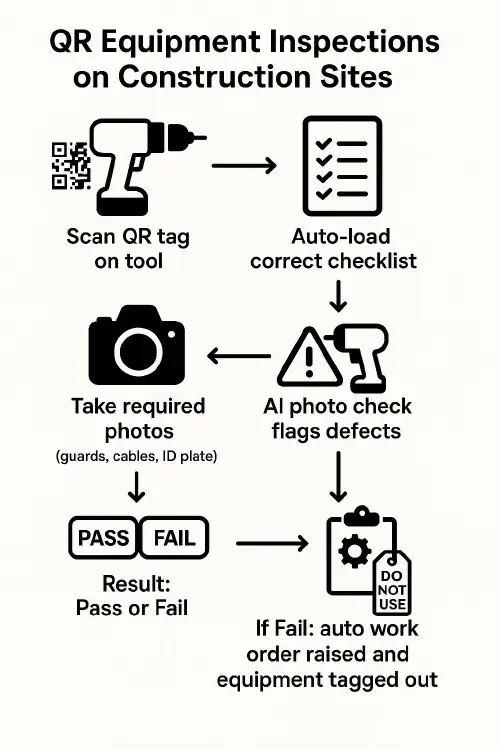
Flowchart: Scan QR, checklist loads, take photos, AI check, pass or fail, auto work order
- Scan QR: Each asset’s QR encodes a unique ID (e.g., TOOL-00457). A scan opens its checklist.
- Auto‑load checklist: The right questions appear for that asset type (grinder vs. MEWP vs. lead).
- Mandatory photos: Prompts for key angles. The system prevents submission without them.
- AI photo check: Flags likely issues (missing guard, frayed cable, damaged plug, worn wheel). You still apply judgement; AI is a helper, not the competent person.
- Pass/Fail logic: Critical failures force a fail. Minor issues can pass with a note.
- Work order + tag out: On fail, a job ticket is created and the tool status flips to Do Not Use until fixed.
Optional video walkthrough
Source: Microsoft 365 — “How to use the inspection app in Microsoft Teams using Power Apps”.
Step-by-step setup
- Build a clean asset register
- Columns to include: Asset ID, type, make/model, serial, location, status, owner, last inspection date, next due date.
- Keep it in a simple sheet or a light database. If you need tags, a free starting point is this asset tag generator from Timly: Free Asset Tag Generator.
- Tag every item with a tough QR
- Use durable QR labels. Stick them where they’re easy to scan and photograph.
- QR should point to a unique inspection link or resolve via the asset ID.
- Create mobile checklists by asset type
- Keep questions short and unambiguous.
- Include a quick risk prompt: “If fail, stand down and tag out.”
- Make photos mandatory and guided
- Require photos of: ID plate/serial, guard or interlock, cables/plug, overall condition, any defect.
- Add on‑screen examples so everyone captures the same angles.
- Add AI photo checks
- Enable an AI step to look for common defects. Treat it as a second pair of eyes, not a substitute for competence.
- Block pass submission if AI flags a critical risk or a required photo is missing.
- Route failures automatically
- Failed items should auto‑create a work order and notify the responsible person on WhatsApp or Microsoft Teams.
- Update the asset status to Do Not Use until repaired and re‑inspected.
- Store evidence and surface trends
- Store all inspections (who, when, where, photos, result).
- Weekly report: top failed items, repeat faults, overdue inspections.
Example: daily checks for a cordless grinder
A simple, PUWER‑friendly checklist with photo prompts and pass/fail logic.
| Item | Check | Photo required | Pass criteria |
|---|---|---|---|
| Guard | Fitted and secure | Close up of guard and disc | Guard intact, correctly fitted |
| Disc | Correct type, no cracks | Edge and face | No chips/cracks, correct rating |
| Cables/Plug | No exposed wires or damage | Plug and cable strain relief | No fray, no heat damage |
| Switch | Works and latches as designed | None | On/off and lock function OK |
| ID plate | Legible serial/model | Serial plate | Plate legible and matches asset ID |
| PPE | Goggles, gloves, hearing | Selfie or acknowledgement | Used/available |
If any critical item fails (e.g., missing guard), status flips to Fail, a work order is opened, and the system sends a Do Not Use notice.
Rollout tips and common pitfalls
- Don’t overcomplicate: Start with 5–7 key checks per asset type.
- Photos are proof: Mandate them. They reduce arguments later.
- Labels matter: Cheap paper QRs peel. Use site‑proof labels and test placement.
- Train the competent person: AI helps, but the sign‑off still needs competence.
- Close the loop: A fail without a fast repair route just creates noise. Tie it to a real work order inbox.
Costs and tools to consider
- QR labels: pennies per tag for durable vinyl/metallic variants.
- Phones: any modern smartphone scans QRs and takes good photos.
- Software options:
- Microsoft Teams + Power Apps Inspection app (well supported, sits where your team already works). Overview video above.
- Dedicated inspection tools (UK example): Crate’s plant inspections app overview page at mydatacrate.co.uk.
- Formal training: CITB offers inspection courses for plant maintenance and reporting. See CITB: Test and Inspection of Plant Machinery.
Integrations and next steps
- Pair with our PUWER guides:
- LOLER and PUWER on site: simple plant inspection setup with QR codes, WhatsApp and a printable checklist
- Power tool pre‑use checks and PUWER: simple daily checklist, QR logging and when to record inspections
- Build a single dashboard that correlates inspections with near‑misses and permits. Spot repeat issues and fix the root cause.
FAQ
Does this replace LOLER thorough examinations?
No. QR inspections help with daily/weekly checks and record‑keeping under PUWER. LOLER thorough examinations are separate legal requirements for lifting equipment at prescribed intervals.
Who is a “competent person” for PUWER inspections?
Someone with the right knowledge, training and experience for the equipment being inspected. AI can assist, but a human competent person remains responsible for the decision.
How often should I inspect?
PUWER requires inspection at suitable intervals. In practice: pre‑use checks for portable tools, daily/weekly for site plant, and as specified by manufacturers or risk assessment. Lifting kit follows LOLER intervals.
What records should I keep and for how long?
Keep the inspection report with date, person, asset ID, result and photos. Retain until the next inspection is carried out and for a reasonable period after. For LOLER, keep thorough examination reports until the next plus two years for certain items.
Can WhatsApp or Teams be used for alerts?
Yes. Many setups notify on fail, create a repair task and update status in your asset register. The key is ensuring failed equipment is clearly tagged out until re‑inspected.
Ready to Transform Your Business?
Turn every engineer into your best engineer and solve recruitment bottlenecks
Join the TrainAR Waitlist