Roof inspection report from photos: a simple workflow that tags defects and builds a PDF
Jump To...
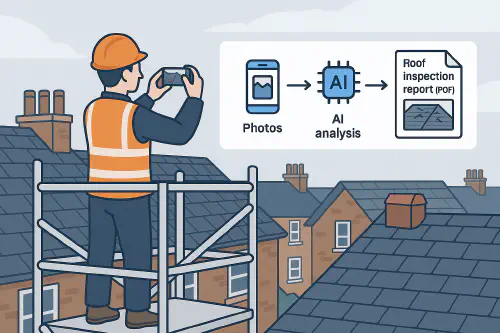
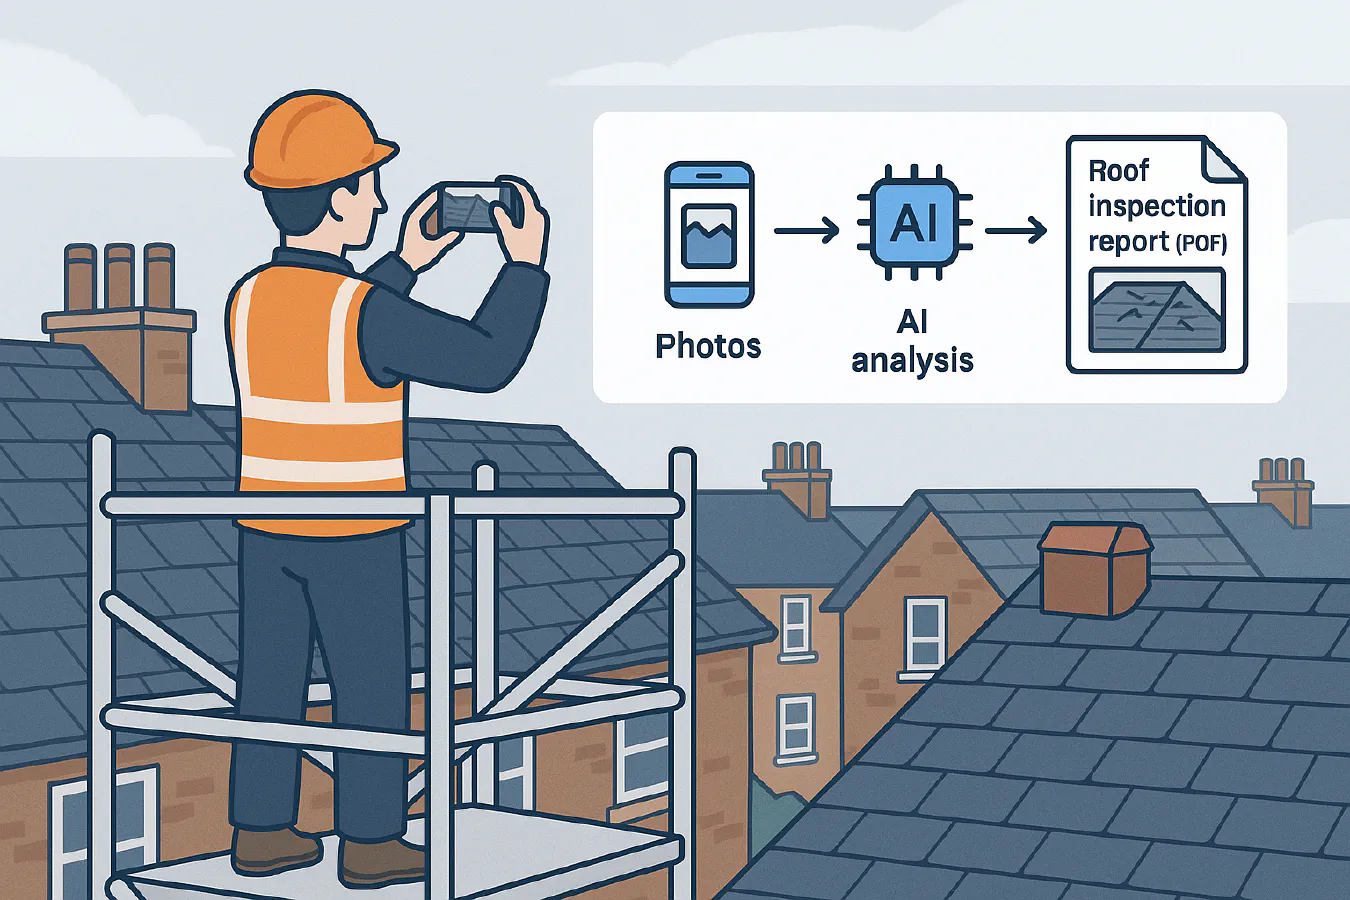
Roofer taking photos feeding an AI pipeline to produce a roof inspection PDF
Who this is for
- Roofers and general builders who send inspection reports to homeowners, landlords and managing agents.
- Surveyors and maintenance teams who need consistent, photo-led reports and want to cut admin.
- Any trade using ServiceM8, Tradify or Jobber who wants reports auto-attached to the job.
Quick answer
You can turn a batch of roof photos into a clean, client-ready PDF in minutes by:
- Uploading photos to a specific Google Drive folder from your phone.
- Letting an AI flow read the images, tag common defects like missing tiles, torn felt, failed flashing and blocked gutters, then draft the report text.
- Auto-building a PDF with annotated photos and cost ranges and attaching it to the job in ServiceM8, Tradify or Jobber for emailing to the client.
This cuts report time from 45 to 10 minutes and makes your output consistent across your team.
How it works
- Take photos on site. Keep a simple sequence: overviews first, then close-ups by elevation, then gutters, chimneys and flashing.
- Drop the images into a dated folder. The automation watches for new files and triggers analysis.
- AI extracts findings, groups them by location and severity, proposes actions and cost bands.
- A report template fills in automatically and saves as PDF to the job record. You can add a personal note before sending.
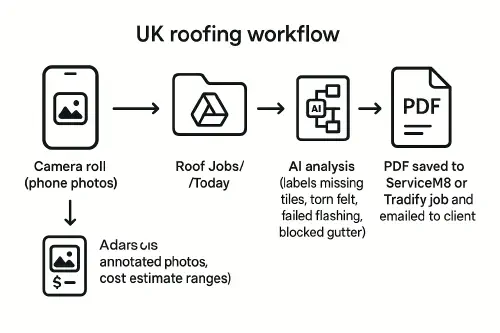
Flowchart: camera roll to Drive to AI analysis to report builder to PDF in ServiceM8 or Tradify
What you need
- A Google account with Drive for file collection. Basic plan is fine.
- One of these job systems: ServiceM8, Tradify or Jobber.
- An automation tool. Make or Zapier both work. Use Make if you want image handling at scale.
- A simple report template (we show one below) and a standard prompt for the analysis.
Step-by-step setup
Option A: Phone photos to Google Drive auto import
- Create folders in Drive like this:
- Roof Jobs/Incoming
- Roof Jobs/Processed
- Roof Jobs/Archive
On iPhone or Android, share selected photos to Drive and choose Roof Jobs/Incoming. Keep each job in its own subfolder: YYYY-MM-DD Client Address.
In your automation tool, watch the Incoming folder and trigger on new files.
Option B: Direct from job systems
If your engineers upload photos straight to ServiceM8, Tradify or Jobber, you can pull them via their APIs. A simple approach is to save a copy to Drive first, then process.
- ServiceM8: watch for job photo attachments and copy to Drive with a job-specific folder name.
- Tradify and Jobber: do the same. Using Drive as a hub makes your reports consistent across platforms.
Build the AI report
Use a vision-enabled model to detect and describe issues, then build structured findings. Example prompt snippet you can adapt:
- You’re a UK roofing inspector. Summarise defects from these photos. Split by elevation where possible. Call out missing or slipped tiles, torn felt, failed flashing, blocked or leaking gutters, chimney defects, pooling on flat roofs. Provide likely cause, recommended action, urgency rating and estimated cost range in GBP. Keep the tone clear and factual.
Then generate a JSON block that looks like this:
{
 "summary": "Overall condition good, localised defects on rear elevation",
 "findings": [
 {
 "location": "Rear elevation, mid span",
 "issue": "Two missing slate tiles",
 "evidence_photo": "IMG_1234.jpg",
 "cause": "Wind uplift",
 "action": "Fit matching slates, check battens",
 "urgency": "High",
 "estimated_cost_gbp": "120-220"
 }
 ],
 "advice": "Re-check after high winds and clear gutters every 6 months"
}
Use this JSON to fill a document template. Most PDF modules in Make can place text and images and draw simple arrows or circles for annotation.
Export to PDF, attach and email
- Save the PDF to Drive under Roof Jobs/Processed/Client Address.
- Attach the PDF back to the job in ServiceM8, Tradify or Jobber and set a task for the office to review in case you want a human glance.
- Auto-email the client with a short message and the PDF attached. Keep it plain and friendly.
UK considerations: insurers, drones and privacy
- Insurance expectations. Many insurers ask for a condition report after storm events. See this overview of what an insurance report usually needs from RJ Evans Flat Roofing Limited: Flat roof inspection for insurance.
- Typical costs. Market guides like Checkatrade’s roof inspection cost help set expectations for paid surveys.
- Drone use. If you use a drone for difficult access, plan flights and keep images organised so your AI output is clean. Hammer Missions has a good walkthrough on drones plus AI reporting here: Solving Difficult Access, roof inspections with drones and AI. For general UK survey context, Aspect’s guide is useful: Roof inspection survey.
- Privacy. Be careful about photographing neighbouring properties. Avoid capturing people or number plates where possible.
Pricing and time saved example
- Old way: 45 minutes per report including sorting photos, typing findings and exporting a PDF.
- New way: 10 to 15 minutes including a quick review of the draft and any personal notes.
- If you do 10 reports a week, that’s 5 to 6 hours saved weekly.
You’ll also lift consistency and reduce callbacks because recommendations are clearer and photo evidence is front and centre.
Troubleshooting
- Photos out of order. Ask engineers to take four orientation shots first, then close-ups. Name the folder with date and address to keep it tidy.
- AI missed an issue. Add a reminder to include at least one overview of each elevation, gutters and chimneys. Low light photos are harder to analyse.
- PDF too large to email. Downscale images to 1600 px wide before placing them into the report.
- Wrong job attached. Always include the job number or client surname in the Drive folder name and in the PDF filename.
Templates: folder structure and report sections
Folder pattern:
- Roof Jobs/Incoming/2025-09-17 14 Acacia Avenue SW16
- Roof Jobs/Processed/2025-09-17 14 Acacia Avenue SW16
Recommended report sections:
- Summary
- Findings by elevation
- Recommended actions
- Cost ranges
- Photo appendix with annotations
Related reading
- If you manage vans and stock, see our playbook: Predictive van stock: how to lift first-time fix and cut repeat visits
- For digital record keeping on site, this helps: Construction site diary template: what to include, examples and a fast digital setup
- If you send documents by WhatsApp, read: Send invoices on WhatsApp: QuickBooks and Xero setup for trades
FAQ
Q1) What does a roof inspection report normally include?
A good report covers coverings, flashings, gutters and downpipes, roof structure where accessible, chimneys and any skylights, with annotated photos and clear recommendations. UK guides like Aspect’s roof inspection survey outline typical contents.
Q2) Can I use AI if photos are from a drone?
Yes. Keep images sharp, include overview and close-up shots and avoid duplicates. The analysis works from any clear JPG.
Q3) Will insurers accept an AI-drafted report?
Insurers care about evidence and clarity. Use the AI to draft, then you or a surveyor should review and sign off. Include timestamped photos and your company details.
Q4) Can this work without Google Drive?
Yes, you can use OneDrive or Dropbox. We show Drive because it’s simple and integrates well with most job systems.
Q5) Do I need to mention regulations in the report?
For private homeowners, keep it plain English. For commercial sites, you can reference relevant standards if needed. Keep claims factual.
Ready to Transform Your Business?
Turn every engineer into your best engineer and solve recruitment bottlenecks
Join the TrainAR Waitlist