Snagging list template for construction: free checklist, photos to capture and a 5‑step closeout flow
Jump To...

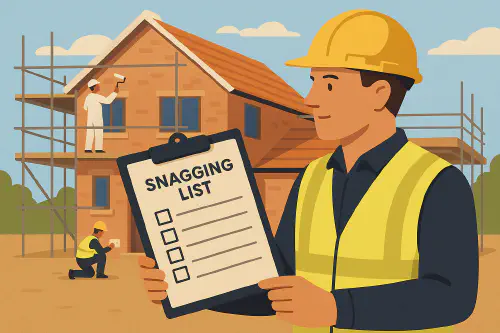
Site manager holding a Snagging List clipboard with a new build behind
Who this is for
- Site managers, foremen and subcontract leads closing out residential or small commercial jobs in Great Britain and Northern Ireland.
- Trades doing end-of-job quality checks before invoicing or handover.
- Office admins asked to collate snagging into a single tracker for sign off.
What is snagging
Snagging is the final quality check to list and fix defects and incomplete items before practical completion. It protects your margin, reputation and handover date. In the UK, new build buyers also do their own snagging lists. Developers often use a snagging app or an Excel sheet to track issues until closed.
Helpful background:
- LABC Warranty checklist PDF: https://info.labcwarranty.co.uk/hubfs/Homeowner%20page%20docs/snagging-checklist-for-new-homes.pdf
- Fieldwire guide to snag lists: https://www.fieldwire.com/uk/blog/what-is-a-snag-list-best-practices/
Free snagging list template
Copy this simple structure into Excel, Google Sheets or your snagging app. Add columns you need for your trade.
Project name | Plot/Area | Room/Location | Issue | Trade | Priority (H/M/L) | Photo link | Assigned to | Target date | Status (Open/In progress/Fixed/Signed off) | Notes
Tip: Store photos in a shared drive with a consistent folder like 01_Kitchen, 02_Bathroom, etc. Paste the photo link to the row.
Downloadable options
- Procore snag list template: https://www.procore.com/en-gb/library/snag-list-template
- Smartsheet selection of snag list templates: https://www.smartsheet.com/content/construction-snag-list-template
How to run snagging step by step

Snagging closeout flow: Inspect, Record, Assign, Fix, Sign off
- Inspect
- Walk each room clockwise then anticlockwise so you don’t miss corners.
- Use blue tape or tags sparingly to mark obvious defects.
- Carry a small level, socket tester, torch and a moisture meter for timber and plaster spots.
- Record
- Log every snag in your sheet or app on the spot.
- Add a short, clear description like Paint chip on bedroom 2 window sill, 30 mm.
- Attach 1 overview photo and 1 close up.
- Assign
- Tag the right trade and set a target date before your practical completion date.
- Batch similar snags per trade to reduce trips.
- Fix
- Trades upload a photo after fix. If it needs rework, keep the same row and update status.
- Sign off
- Site manager rechecks, marks Signed off and initials. Export a PDF to send to the client.
Common snags to look for
- Paint: runs, missing second coat, touch ups not blended, splashes on frames.
- Carpentry: squeaky boards, tight doors, missing fixings, loose skirtings.
- Electrical: dead sockets, mixed up switching, missing blanks, exposed CPC tails.
- Plumbing: drips on compression joints, slow traps, wrong falls, loose WC.
- Heating: radiators not bled, TRV orientation, boiler pressure low, air locks.
- Bathrooms: silicone gaps, out of level trays, loose tiles, wobbly screens.
- Windows and doors: catches misaligned, sealant voids, scratches on glazing.
- External: pointing voids, trip hazards, uneven paving falls, gutter leaks.
Photos to capture
Use a quick naming convention like 2025-09-14_Project_Plot12_Bed2_WindowSill_Chip.jpg.
- Overview photo: shows location in the room so anyone can find it fast.
- Close up photo: shows the defect clearly with a ruler or coin for scale.
- After fix photo: same angle as before. Keep it in the same folder.
What are people saying on Reddit
- New build buyers often ask whether to DIY or hire a snagging survey: https://hoa.org.uk/advice/guides-for-homeowners/i-am-buying/need-snagging-list-new-build-home/
- Discussion on acceptable finish and when to push back: https://www.reddit.com/r/Construction/comments/1mfag0d/is_this_acceptable_finish_from_a_new_build/
- Thread on timing of snagging after completion: https://www.reddit.com/r/HousingUK/comments/1l5pcqd/snagging_a_few_months_after_completion_on_new/
Helpful links
- LABC warranty checklist PDF: https://info.labcwarranty.co.uk/hubfs/Homeowner%20page%20docs/snagging-checklist-for-new-homes.pdf
- Sitemate snag list template and app: https://sitemate.com/templates/quality/forms/snag-list-template/
- Fieldwire best practice guide: https://www.fieldwire.com/uk/blog/what-is-a-snag-list-best-practices/
Related TrainAR Academy articles:
- Artex asbestos: how to test, NNLW vs non-licensed, safe drilling and removal steps
- Construction performance reviews: templates, KPIs and how to run them on site
- Near miss reporting on construction sites: simple steps, examples and a QR code setup
Ready to Transform Your Business?
Turn every engineer into your best engineer and solve recruitment bottlenecks
Join the TrainAR Waitlist