
Website chat to job: capture address and photos, then auto‑create jobs in ServiceM8 or Jobber
Jump To...
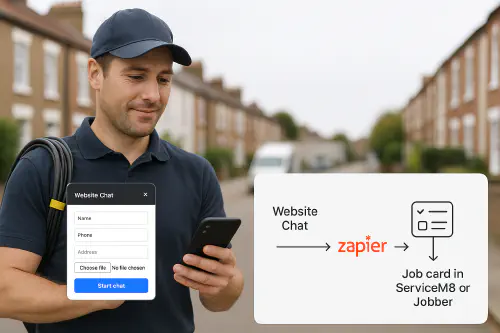
UK tradesperson using a website live chat to capture address and photos, flowing into Zapier and a job card
Quick answer
Add a website chat widget that asks for name, phone, address and photos. Send that data into Zapier and auto‑create a new client and job in ServiceM8 or Jobber, with the photo links saved in the job notes. This cuts admin, speeds up scheduling and improves first‑time‑fix because you’ve photos before you roll.
Who this is for
- Owner‑operators and small teams who miss calls while on the tools.
- Office managers who spend time copying enquiry details into job software.
- Trades where photos speed quoting or triage: plumbers, electricians, HVAC, roofing, flooring, glazing.
What you will set up
- A pre‑chat capture flow that collects name, phone, address and one or more photos.
- A Zapier automation that:
- Creates or finds the customer.
- Creates a job or request.
- Adds a note including the photo link(s) and the full address.
- Tags the record with “website‑lead”.
Diagram
Website Chat → Zapier → Create/Find Client → Create Job/Request → Add Note with photo links → Notify team
Tools you need
Use any of these chat tools. Tidio is the easiest for file+address capture via an in‑chat form.
- Tidio (supports in‑chat forms with File field) docs
- Crisp (supports file uploads; generic Zapier message triggers) docs
- tawk.to (supports file uploads; Zapier triggers for chats/tickets) docs
- Zapier (automation hub) Zapier directory
- Your job system: ServiceM8 or Jobber via Zapier
Logos you’ll see in this guide

Before you start: cookie consent and GDPR
Most live chat widgets set non‑essential cookies. In the UK, you must get consent before loading non‑essential cookies. Practical approach:
- Only load the chat widget after the user opts into non‑essential cookies in your banner.
- Or show a “Click to open chat” button that explicitly loads the widget (consent by clear action).
Guidance: the ICO explains cookie rules and consent patterns for similar technologies. See the ICO’s guidance on cookies and similar technologies at ico.org.uk.
Step-by-step: Tidio chat to ServiceM8 via Zapier
Why Tidio for this? The built‑in Pre‑Chat Survey doesn’t include a file field, but Tidio’s in‑chat “Send a form” action lets you add a File upload and custom fields like Address, then push everything to Zapier.
References:
- Tidio “Send a form” with File field and custom fields help.tidio.com
- ServiceM8 Zapier app (Create Client, Create Job) zapier.com
- Build the capture form in Tidio
- In Tidio, create a chatbot flow.
- Add a “Send a form” action with these fields:
- Name (Name)
- Phone (Phone)
- Email (Email)
- Address (Text)
- Photos (File) up to 10 MB per file. Supported types include jpg, png and pdf. See Tidio file limits in Types of files supported.
- After the form, add a “Send to Zapier” node and map each field into the payload. Save the photo’s file URL to a contact property or directly into the Zapier payload.
- Create the Zap (high level)
- Trigger: Tidio → Contact Sent From Bot (the node you added).
- Action: ServiceM8 → Find or Create Client
- Map name, phone, email and address.
- Action: ServiceM8 → Create Job
- Client: use the ID from the previous step.
- Job description: include the issue summary and the full address.
- Tag: website‑lead.
- Action: ServiceM8 → Add Job Note (if available in your account)
- Paste the photo file URL(s). If there’s no note action in your plan, include the URLs in the job description.
- Action (optional): SMS or email to your dispatcher.
- Field mapping tips
- Names: keep one line for full name; split later if needed.
- Address: if customers paste long addresses, keep it as free text; you can standardise later.
- Photos: Zapier can pass URLs through. ServiceM8’s Zapier app doesn’t upload file binaries, so place the URL(s) into notes/description for the engineer to open in the app. You can later attach the files manually in ServiceM8 if needed. ServiceM8 help on attachments is here: support.servicem8.com.
- Test end‑to‑end
- Open your site, accept non‑essential cookies, and submit the Tidio form with a real photo.
- Check Zapier task history for the file URL and address.
- Confirm the client, job and note appear correctly in ServiceM8.
Example Zap structure you can copy
- Trigger: Tidio → Contact Sent From Bot
- Action: ServiceM8 → Find or Create Client
- Action: ServiceM8 → Create Job
- Action: ServiceM8 → Create Note (or append to description)
- Action: Email/SMS notify scheduler
Map it to Jobber instead
Use the same Tidio trigger, but switch the job system steps:
- Trigger: Tidio → Contact Sent From Bot
- Action: Jobber → Find or Create Client
- Action: Jobber → Create Request (or Create Job, depending on your intake process)
- Action: Jobber → Add Note to Request/Job with the photo URL(s) and address
Notes:
- Jobber’s Zapier app supports creating clients, requests and jobs, and adding notes. It doesn’t upload file binaries via Zapier; include public file URLs in the note. See Jobber’s Zapier guide: help.getjobber.com and how notes/attachments work in‑app: help.getjobber.com.
Optional: AI triage and postcode auto-assign
- AI triage: Add a Zapier AI step to classify urgent phrases (e.g., leak, live wire, no heat). Set a “Priority: High” tag or notify your on‑call engineer.
- Area auto‑assign: Ask for postcode in the chat. Use Postcodes.io to map postcode to area and auto‑assign the job to the right engineer. Postcodes.io is here: https://postcodes.io
Testing checklist
- Chat widget only loads after cookie consent.
- Form requires name, phone and address before allowing photo upload.
- Zap creates one client only (no duplicates on repeat enquiries).
- Photo URLs are clickable from your mobile app.
- Job is tagged website‑lead for reporting.
- Internal alert fires to the right person.
Troubleshooting
- No photos in the job: ServiceM8/Jobber don’t upload binaries via Zapier actions. Include the file URL(s) in notes/description. If the link is private, use a share link or store files in Drive/OneDrive with shared URLs.
- Tidio form missing Address or File: Use the in‑chat “Send a form” action, not the basic Pre‑Chat Survey. Tidio’s form supports File and custom Text fields.
- Chat loads without consent: Update your cookie banner to block the chat script until the user opts in to non‑essential cookies. The ICO’s guidance covers this requirement: ico.org.uk.
- Job duplicates: Use “Find or Create Client” as your first step to reduce duplicates.
Costs, limits and gotchas
- Tidio file uploads are usually limited to 10 MB per file; confirm your plan’s limits in their help. Tidio file types and sizes
- tawk.to allows larger files (often up to 50 MB via widget), but Zapier triggers are higher level (chat started/ended). tawk.to file support and Zapier app
- Crisp can trigger on incoming messages; if you need exact file metadata via automation, use its API. [Cr…
Related articles
- WhatsApp enquiry QR to job: set up a 5 minute intake that creates jobs in ServiceM8 or Jobber
- Voicemail to job: auto‑transcribe missed calls and create jobs in ServiceM8, Jobber or Tradify
- Email to job: set up automatic job creation from enquiry emails (ServiceM8, Jobber, Tradify)
Ready to Transform Your Business?
Turn every engineer into your best engineer and solve recruitment bottlenecks
Join the TrainAR Waitlist